Introduction to Common Water Heater Issues
Hot water systems are essential for daily activities, but can face problems like no hot water, irregular temperatures, leaks, unusual sounds, and discoloured or unpleasant-smelling water.
With more than ten years of experience as Randwick plumbers and heating system specialists, we often handle issues relating to tankless water heaters. Many hot water system concerns are preventable or solvable with straightforward troubleshooting and consistent upkeep.
This guide covers standard problems affecting hot water systems like electric, gas, tankless, heat pump, and solar heaters. We’ll cover how to identify problems, perform easy DIY repairs, recognize when to seek professional service, and maintain the system’s longevity.
Checking Power Supply and Thermostat Settings
Before troubleshooting thermostat or heating issues, it’s important to Ensure your water heater is powered. Start by checking the fuse box or locating the circuit breaker linked to the water heater and use a non-contact voltage tester to confirm power availability.
If power reaches your unit, proceed to check the thermostats and pressure relief valve. Modify them to achieve the correct temperature, ensuring your hot water is neither scalding nor just tepid., and investigate further if issues continue.
For electric water heaters, adjust the upper and lower thermostats to approximately 49°C and 60°C, respectively, to maintain optimal water temperature.
On gas water heaters, the thermostat dial adjusts the temperature, often up to 71°C. If hot water is lacking, gently increase the temperature via the hot tap and assess changes. Should this not rectify the issue, proceed to examine the heating elements (for electric heaters) or pilot light and burner (for gas heaters).
Testing Heating Elements
Electric water heaters have one or two crucial heating elements that heat the water in the tank. To determine if defective heating elements are causing hot water issues:
- Verify to turn off power circuit to your electric water heater using a noncontact voltage tester before touching any components.
- Remove the access panel(s) to visually inspect the upper heating element and the lower heating element.
- Check for any signs of damage like cracks or breaks. The elements should be fully submerged in the water.
- Employ a continuity tester or multimeter to verify electrical flow through each element. Little to no resistance means the element is working.
- If an element is damaged or doesn’t have continuity, it will need replaced. Enlist a licensed electrician or plumber to replace the element.
If the elements check out fine, move on to inspecting the upper thermostat, hightemperature limit switch, and other components to solve problems hot water heater faces. Troubleshooting water heaters requires caution as issues like a short circuit or water leaks are a possible cause for concern.
Troubleshooting Gas Water Heaters
Gas water heaters rely on a pilot light to ignite the control burner assembly and heat the water. If you have no hot water, firstly verify that gas is reaching the unit.
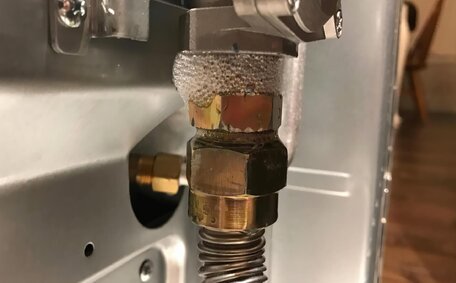
- Identify and close the gas supply at your line, carefully listening for potential leaks. Use a spray bottle to apply soapy water while the gas is on and look for bubbles.
- If leaks are present, turn off the gas supply promptly and consult a professional to repair as soon as possible.
- If no leaks found, check that the pilot light is lit. Relight it if needed per the manufacturer’s instructions.
- Assess the flame colour and pattern. A strong blue signifies appropriate combustion; whereas a yellow, wavering flame might suggest gas pressure irregularities or other issues.
- Check the damaged gas control or thermostat next if the pilot light won’t stay lit or the burners seem weak. Replace them as needed.
Persistent gas water heater issues like low water pressure, defective dip tubes, inadequate flue dampers, deteriorated thermocouples, or sediment accumulation necessitate attention. While routine tank flushing can be beneficial, complex repairs are best undertaken by skilled technicians.
Relighting the Pilot Light
If your gas water heater is not heating water properly, the pilot light may have gone out. To safely relight it and ensure hot water all around:
- Locate the pilot light assembly on the base of the tank. There will be a small cover to remove.
- Before no hot water check, ensure there is sufficient ventilation. Open all doors and windows in the vicinity.
- Push in the gas control knob and turn it to the "pilot" position.
- Press a long lighter wand or match to the pilot assembly while pressing down the gas control knob. This allows gas flow.
- Hold down the knob for a few minutes after the pilot light ignites. Release slowly once lit to avoid extinguishing the flame.
- Finally, turn the hot water faucet on and set the gas knob to the "on" position. Set the temperature dial to heat water.
Should the pilot light not stay lit, it might be time to replace a worn-out thermocouple. Acquire the appropriate part and follow the installation guide closely. Continually re-igniting the pilot won’t be effective with an aged thermocouple.
While a simple DIY fix, extreme caution should still be exercised given the gas and fire hazards. Consider enlisting contact your plumber if you’re unsure about getting hot water to function optimally. Detecting a gas leak, on the other hand, necessitates immediately to call your local emergency plumbers after shutting off the gas.
Checking the Thermocouple
The thermocouple is a safety device installed into water heater’s pilot light assembly in your tank. It senses the pilot flame and signals the gas control valve to open and allow gas flow to the burner. If the thermocouple malfunctions, the supply water heater with necessary gas to remain operative stalls, causing the pilot light to extinguish.
To check the thermocouple:
- Turn off the gas supply to the water heater.
- Remove the outer cover panel to access the pilot assembly.
- Visually inspect the thermocouple for any damage or corrosion.
- Check that the connections at both ends are tight and secure.
- Using a multimeter, check for continuity, as this ensures your heater working as intended. Little to no resistance when probes are touched indicates proper operation.
- If the thermocouple is damaged or fails the continuity test, purchase a replacement part matching your heater model.
- Carefully install the new thermocouple per the manufacturer’s guidelines.
Thermocouple issues that are handled improperly present significant risks due to gas control valves and combustible materials. If in doubt, it’s prudent to employ a professional plumber for the replacement. Prompt repairs keep the pilot flame lit and ensure an uninterrupted hot water supply.
Maintaining Your Water Heater
Preventative maintenance extends your water heater’s lifespan and avoids issues like fluctuating temperatures. Flushing the heater annually removes mineral deposits and sediment, especially important if your hot water usage increases.
To maintain water clarity and prevent sediment buildup, follow these steps to flush your electric water heater:
- Turn off power water to electric heaters or the gas valve and pilot light for gas models.
- Attach a garden hose to the drain valve at the bottom of the tank.
- Drain a few litres firstly, then shut the valve and refill the tank, checking the water for cleanliness and absence of sediment.
- Repeat draining and refilling fresh water 2-3 times to rinse all sediment out.
- Inspect washed out sediment for signs of anode rod deterioration, which can indicate not having enough hot water than usual. Consider replacing it if heavily worn.
- Restore power/gas and relight pilot if needed once tank is refilled.
Additionally, as part of your yearly water service, inspect for leakages in fittings, pipes, and valves, and shut off the water if needed. Tighten connections as required and replace worn parts. Keep the area around your heater clutter free and maintain electrical access for maintenance.
Replacing the Anode Rod
The anode rod is a sacrificial metal rod inside your water heater tank. It attracts corrosion instead of letting the tank corrode. As it corrodes over time, you may notice rust coloured water, increased sediment, or a rotten egg smell indicating it needs replacement.
Follow these steps to swap out the anode rod in your tank water heater:
- Turn off power to an electric heater or the gas valve/pilot on a gas heater.
- Drain 2-3 gallons of water from the tank.
- Remove the old anode rod with a socket wrench and discard.
- Use Teflon tape on the threads and insert the new rod, tightening firmly.
- Refill the tank and turn the power back on or reignite the pilot.
For optimal results and to guarantee correct functioning, get a licensed plumber to replace the anode rod. Replacing it every 3-5 years extends tank life by protecting against corrosion.
When to Call a Professional
If hot water problems persist despite DIY attempts, it may be time to seek professional assistance. Contact Randwick Plumbing at 1300 349 338 or send an email to [email protected] for expert resolution.
- Continued absence of hot water despite basic troubleshooting steps
- Faulty pilot light unable to stay lit
- Problems traced back to complex components like the thermocouple, dip tube, etc.
- Installation of new water heater or parts
Our licensed, fully insured plumbers are equipped to handle complex issues with your home’s electric water heater. With a well-stocked vehicle ready for numerous repairs and transparent pricing, Our team is ready to provide professional assistance to maintain a reliable and efficient hot water supply.


